kick out dan, despite his good looks and get us slayer
The thread has spoken!

Dan does not sound put out by our decision to eject him from the party.

Zuran on the other hand parts with us on good terms and is eager to work with us again should we call him up again. And who knows? Maybe the thread will see to it that he comes back to us one day.


But for today we’re adding in Slayer and Destry. I am aware that the thread did not explicitly call for adding in Destry, but there’s something about Destry that I’m going to show off.
That being done, we now set foot out of Dubour and start the second leg of our trip to the equator. Note that we want to go southwest of the town, as the east just leads to mountains in our way.

This is the damage that Destry can do with BreakA. This is solid damage, very unlike the poor Bomb Bottle that obsoleted itself the second it was exposed to sunlight.

This is the animation for the Heat spell. You basically turn the entire battle field into a lava lamp. Its very soothing.

Dealing that much damage to all enemies is very soothing

Chezni gained a level from that fight. Power 5, Speed 5, Endurance 3, Luck 5.

And Midia also gained a level. Power 4, Speed 4, Endurance 4, and Luck 5.

And belatedly, this is what BreakA looks like. A whole bunch of these air missile things zip across the screen and then damage the enemies.

Along the way we see this interesting looking structure behind some mountains. We have no way of getting there right now, but keep that in mind for later.

Slayer has used his Wall spell here and it successfully applied to everyone in the party.

As a result, the damage from the Heliopit’s area attack is significantly reduced. I like buff spells that are worth casting.

This damage here came from Chezni using his Fire Shield to cast FireS. If Destry did the same thing, he wouldn’t do anywhere near as much damage since he doesn’t have a Fire spirit to level up.

New enemy time, Windbirds can hit the entire party with a nasty wind element attack that does around 50 points of damage, depending on how much we’ve developed our Sky spirit. Add on four Sacryfurs down below, and this is a fight that can become very annoying.

Here you can see the results of a DEFdown spell being successfully applied to the enemy. Not that it targets a group of enemies. Also, the flickering is uneven but it went on all the Windbirds.

Thus Destry’s Battle Cutlass hits the three of them for twice as much damage as it normally would. Combine that with STRup, and that damage can add up fast.

After that fight, Chezni gained another level. Power 5, Speed 4, Endurance 2, Luck 5

And so did Midia. The days of one of our leads gaining a level without the other are fading behind us. Power 4, Speed 4, Endurance 2, Luck 4. The days of bad endurance growth are not behind us unfortunately.

And the Windbird and Heliotip combo proved too much for a reckless Chezni and he got murderfied. Fortunately, running away is reliable enough, I get away from the battle without ruining my experience balance and once we’re out of battle Chezni wakes back up with 1 HP. So we heal him back up and resume our journey to the equator.

Slayer manages to gain a level on the trip! Power 2, Speed 2, Endurance 5, Luck 4

Don’t be like me, always remember to heal after fights so you don’t get this close to the edge and are crossing your fingers that the BlowUp will kill all the enemies with the rage of a miniature sun.
Lucky for me, it did.

I used a lot of Mini bottle charges, including all the ones in my inventory and most of Slayer’s, but I’m back up and ready for another fight!

Heck, Destry gained a level! Power 5, Speed 2, Endurance 2, Luck 6. Now we’re really prepared for another fight!

Or I can make it to the Equator cave without having another encounter. Same difference really.

Right away we’re greeted with the peaceful town music and also the kind of symmetry that I used to compulsively insist on when I would make maps. Ah, nostalgia.

There are a number of guards here, attesting to Daphne’s fame and importance. The two on the bottom say the same thing.

This guard will restore our bottles for free. Very nice.

This guard heals us for free. Also very nice.


Before talking to Daphne, I think it would be a good idea to check our magic progress. Chezni’s almost done with his Sphere spirit, while Midia is almost done with her Light spirit. By carefully planning and organizing our magic, we are becoming very strong for our level.
Now, because we’ve come such a long way in search of Daphne, I’m going to show off all of her dialogue in its entirety.


If we answer no here, she will repeat what she said about the items of Kormu

Now she’s going to give us a pop quiz. Getting anything wrong here will also cause her to loop back and re-explain about the items of Kormu. She’s a very patient teacher, better than some teacher’s I’ve had.


With all that taken care off, we can now advance. The guard to her left sells the Light spirit, while the guard who was blocking the door to the right sells the Sphere spirit. We already have both, so we can just move on.

There is uh…something about the design of that teleport pad that I can’t quite put my finger on.

We are here now! Where is here?

It can be hard to tell, but that little box in the upper middle portion of the northern continent is where we are right now, and that little island just off the southwest portion of Naskuout is where we were. Daphne sent us off a long way.
After a while we come upon a portside town and just casually walk on in…

And then Destry robs us blind and runs off, nowhere to be found! Yep, as soon as you enter a town with Destry in your party, he takes half of your money and leaves. What a god-be-damned asshole. Fortunately, by the power of save states, this no longer happened!

We give Destry the boot right outside of town, so this way he doesn’t get to take away any of our hard earned cash. It still does leave us with only Slayer, and to be honest, Destry’s BreakA spell was much better than Slayer’s Wall spell.

In any event, things are peaceful here in Lagon. And you’re damn right I want to see a dragon mountain!


Huh. Probably geothermal vents or something.

This is the exact same inventory as back in the hidden shop in Dubour. If you missed out on the hidden shop there, now’s your chance to catch back up.


Examining the dragon statue gives us a Sky card which gives Chezni a very welcome five points towards his sky spirit. Awesome.

If we say no, he’ll explain the myth; long ago there was a dragon named Strabo unleashed by the evil immortals of Raiga who rampaged across the land, killing many. Then the hero Kormu faced him with the three items and slew him in a terrible battle. Supposedly, the mountain to the north is the dragon’s corpse.


Goes to show that even if Lagon isn’t being directly impacted, the state of the rest of the world does have an effect here.

When the bars are having to fold, you know the economy is in shambles.
But, the bar isn’t closed yet, so that means new merenaries!


Wild is known as Irene back in Lennus. Her Glow Bow is able to attack a group of enemies, her Rain Clothes can heal herself in battle for free, and she’s got some good spells. Also she is cute.


MeanMa was known as Melanie in Lennus. I don’t understand how our translator got from Melanie to MeanMa. In any event, she is the first character to have a High Bottle, which heals for 800 points of damage and we’re starting to get to where that’s going to make a big difference over the Mini Bottle. She’s got some good utility magic too. Sure, she says not to dismiss her, but I’m pretty sure that if we ask her nicely when the time comes that she’ll leave with fond memories in her heart.
So, shall I recruit both ladies, or will I leave one of them behind and keep Slayer for the Dragon Mountain? Heh, that sounds like a metal song right there.
6 Likes
Slayer and Melanie!
SCREW MELANIE PIIIISH
SLAYER N WILD sounds like a spinoff videogame
3 Likes
Lucky & Wild x Revolution X
but she just wants friends…
Father.Torque, for the sake of clarity, you are voting for me to keep Slayer and recruit Wild. Is that your vote?
Heck yeah
With two votes in favor of Slayer and Wild and only one vote against, the will of the board is heard! With our new mercenary and her water magic in tow, we leave town and cross the bridge to the north. Not long after that, a monster encounter!

Do not make fun of Gregory’s name; he can hit the entire party with a Break magic effect that can do as much as 88 points of damage if you don’t have any sky spirit experience. The Stingbags on the other hand do physical attacks that can hit a variable number of party members for significant damage.

Chezni was lucky to make it out of that fight alive. Not a promising start. Now, Wild gained a level after this fight, but I’m not going to show the stats she gained from that for a reason.

That reason being this encounter. The Thunder Espers can hiit the entire party with powerful electric magic, and the Roterpits can hit multiple party members twice per round.
They killed me and I died and I decided to do some grinding outside of town before moving on. Fortunately, the monsters immediately outside of town are not too difficult. Good game design.

The cornrats can use speedup on themselves and other groups of enemies. Enemies getting their attacks off before us is bad, so killing them quickly is a good idea. Fortunately, between BreakG and her Glow Bow, Wild is able to do consistently good damage, and her Rain Clothes are effective at keeping her alive with the free healing they provide.

Roterpods can inflict poison. As poison does nothing in battle, that is not a concern.

The real concern is their ability to call in more of them, which is why we explode them all and leave no survivors.

The Deathtric can either paralyze or drain health, and with all these different enemy groups going on, each with their own different way of threatening us, it can take a moment to assess which enemies should be given priority.


After a few encounters Midia and Chezni gain levels. Midia gains Power 4, Speed 7, Endurance 4, and Luck 7. Chezni gains Power 5, Speed 4, Endurance 3, and Luck 5. With these stat gains in place, I decide to make another go to visit Dragon Mountain. All in all, this took 5-10 minutes.

And on my trip to the Dragon Mountain, this enemy set is the only one I get. The Red Witch uses fire magic which does absolutely nothing to Chezni thanks to his maxed out Fire spirit, while the BalloonG’s spend their turns charging up to explode, but on the whole are easy to kill before they do so. If I’d been getting them on my first attempt, I would likely not have needed to stop and grind. That’s RNGsus for you.

That down there is Dragon Mountain, and you can see the cave that the one guy in town was talking about. Man, wouldn’t it be wild if that turned out to be the dragon’s mouth or something?

But before we get in there, Slayer’s gained a level. Power 4, Speed 4, Endurance 4, and Luck 3.

Just want to show that this is the end of the road; the only way for us to progress is to find out what’s on Dragon Mountain.

And also we’ve hit the milestone of maxing out Chezni’s Sphere spirit! Two down, six to go, and we haven’t even gotten one of Kormu’s items yet.

Similarly, Midia’s gotten Light maxed out as well. Our heroes are doing very well for themselves.

Dragon Cave looks very unlike anywhere we’ve been before, and it sounds very unlike anywhere we’ve been before too. Been a while since I’ve been able to post new music for the thread.

There is something…unsettling, about this cave.

The enemies and the backdrop for the battle is equally unsettling. Parasites can drain health while Bacteria can hit multiple characters. Fortunately, with the spirits that Chezni has developed, Heat can kill these macro diseases with incredible efficiency.

And this battle features the other two enemies in Dragon Cave. Virus can hit multiple characters, while Amoeba can use a status effect, but it never successfully applied so I don’t know what it would have done. Also, while their attack animation is a bolt of lightning, it is not a magic attack, since the screen does not go dark when it uses it.


Here are some levels that I’ve gained after one fight.

This is an ambush, hence why I’m taking damage, but I wanted to show off the backdrop without any monsters in the way.


More level ups.

There’s something about the shape of this part of the cave that stands out to me. Everything else has been long winding tunnels, and there are no treasure chests anywhere.

One more level up for the road.

Accompanying this goo is a gurgling noise.

It carries us down…

And out a mouth.
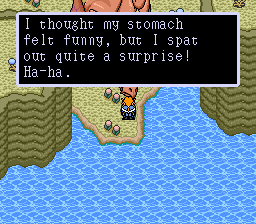
It is unfortunate that the text box is hiding the dragon’s face like that. Also, we passed through the stomach and came out the mouth, which means that the Dragon Cave we entered was…
Was…
…
The Wonderous Misadventure count is now minus ten.
8 Likes
every time i see Slayer’s quote, all I can think is meatloaf singing “I can withstand anything, but I can’t withstand that!”
anyway sorry to your party for climbing into a dragon’s butthole
1 Like
The party appreciates the sentiment and also has chosen to completely forget that detail of this Wondrous Misadventure.

That’s very unusual. How’d he know we’d be coming here?

And now he’s going to monoluge at an immortal that no one’s seen in 10,000 years!


Well hot dog, that’s exactly what we were hoping to find here!

I guess getting that sword in his back messed up Strabo a lot worse than anyone imagined.

After doing that, the screen shakes and rumbles. Unfortunately the rumble pack had not been invented yet, so no shaking for our controllers.


Considering that this guy was supposed to be a rampaging dragon who killed and ate as he pleased, this could have gone a lot worse. Strabo’s a pretty nice guy once you get to know him.


We rise and take off on Strabo’s back, and a majestic theme plays.


We fly further south than we’ve ever gone before, flying over where the currents are flowing very, very strong out.


With a heavy impact we land in a place with a much darker color scheme than back home.


He is not kidding about this being a place of red earth and dark souls. That’s even the title of the Saskuout theme back in Lennus. Well. Almost.

Also, Strabo’s body disappears after he dies, leaving behind this pool here.

It is a healing pool, making this a good spot to grind at if you need more levels.

And before I forget, I bring up the menu. Here is my attack before Kormu’s sword…

And here it is after. The biggest jump in attack power we’ve seen.

By moving to the east, we find these structures. We start by investigating the ropeway station on our left.

And that’s as far as we can go.

The people of Saskuot are not very friendly to us. A fact that is reflected in the Saskuot town theme.

Upon entering the weapon shop I check my status for no particular reason.


If we talk to the merchant, he will stab us for a pretty substantial chunk of our HP.

And it would seem that the thing that is giving us away as people of Naskuot is our horrendous stench.

We will be checking that tent out anyway, but we have more rudeness to explore around here.

Chezni is 13 and on a quest to defeat the hell beast he unleashed. Caring about his health is not on the schedule. The man goes on to explain that there is an important treasure there and if we try to take it, the temple security will deal with us.


Unlike the weapons merchant, he does not make good on his threat to hit us.


Do we look like clowns to you? Don’t answer that.


How hold on a second there, Daphne is the second advent of Gabnid! Someone’s been telling you fibs!


The Sky card gives Chezni another 4 points in his sky spirit, while the P fth…

We somehow drink it but it gives Chezni five points of quickness so like hell I’m complaining.

No go on the inn. At least we can still save.

To the shock of absolutely no one, the item merchant will not do business with us either.

And with that we’ve talked with everyone in Barsas. The time that we spend here in Saskuot is going to be difficult.

Fortunately, all is not lost; the minstrels tent has a free inn for us to use.

Not captured in the screenshot; this dancer spinning around.

He says that the weapons shop in Barsas is supposed to have really good stuff, but how will we get him to sell to us stinky Naskuot people? The answer will have to wait until later.

I have no idea what he thinks he’s saying.

What’s important is that he charges four times the normal market rate, but he’s also the only game in town so we just have to put up with it.

If we answer no…

If we answer yes…


We now have our mission parameters clearly set out for us. But there’s one more person in this tent to talk to.


That’s right, we have a new mercenary candidate! FastJo, or Rastan, has such a friendly face.
The Battle Cutlass lets him hit a group of enemies in battle, and the ATback spell makes it so that he can reflect physical attacks directed at him back at the enemy.
Now, I’m going to level with you; Slayer is falling behind pretty badly. The fact that he can’t do multi-target damage is a major limitation since most encounters in the game will have lots and lots of enemies in them. That said, his wall spell is nice, and he does ha who gets to stay and who gets the boot is up to the will of the thread.
6 Likes
i am attached to slayer
FastJo, SlowJo…I’m the Jo with the gun…
sorry i’m just word associating here, please don’t count this is a vote for anything
slayer is cool but hes exactly the kind of party member i would only use temporarily. this new guy looks raw as fuck
I’m probably looking at the headshot wrong but FastJo looks like a mustache fairy to me and I’m not gonna not pick to go with the mustache fairy.
since the dragon had to wait ten thousand years for you to come i think you could use a little FastJo in your party
2 Likes
gotta jo fast
(this is a vote for fastjo)
Fun story, I actually had this done yesterday, only to accidentally exit out of the game before I saved and thus had to do it all over again!


In accordance with the will of the board, Slayer parts with us while FastJo comes along for the ride.


By going off to the southwest, we get a Light Card for Chezni. Our real destination though is off to the east; to get there we need to cross a bridge south, and then another bridge north.

And here we have new enemies; the Splitbug, or Hairball Bug back in Lennus, can split into two if you hit it with a physical attack, dividing their hit points among themselves. This process can be repeated and is not recommended as they can do very powerful single target electric magic attacks. The Fiorlans, or Fiorla Soldiers, do melee attacks and can bring in allies, provided there is room for them.

Microrats, or Piropons, don’t do too much damage dirrectly, but they can apply a magic barrier to themselves that lets them reflect magic damage back at you. Fortunately they only do so one at a time, or else multi-targeting magic would get super dangerous to use super fast. As for the Cathys, or Thunder Princesses, they are the bane of our existence. They can use single target or multi-targeting lightning magic that can do over 100 points of damage to FastJo and Wild. Using MGDown to reflect some of that damage back at them can be a very good idea. Wild’s Break spells are not very effective on them, so have her attack with her GlowBow.

And with that Midia gains a level, leaving Chezni behind for one more fight.

And now we enter the consecrated ground; this is an open air area with rings of water and four chests at the corners of each ring, meaning there are twelve chests in total. I guess they wanted to make up for the lack of chests at the Dragon Cave.

The chest in the lower left contains a Bomb Bottle, which I decide to experiment with on Chezni. As it turns out, the Bomb Bottle’s damage scales with your strength and attack power, so Chezni can get some very good multi-targeting damage, especially with DEFdown and STRup supporting him. Granted, I’m still focusing more on my magic to keep it leveling up, but it is a nice alternative.

These guys with the very long faces are Z Masters, or Corpse Users. They are actually the weakest enemies in this area…mostly. They do three things; a single target fire magic attack that does moderate damage, a group status spell that never successfully applies during this run, and an instant death spell that I can’t recall ever seeing work. Still, every time they try instant death, it gets tense. It doesn’t help that there’s something that appears behind them when they do the instant death spell.

That fight was all it took for Chezni to catch up on his level.

We already picked one up in Dubour, but if you wanted to be frugal, you could wait until now.


Another Light card means saving a little more time on building up Chezni’s spirit.

The Beholders are better known as Raga Eyes, since they are not nightmares of ten different random magic spells, but rather just do single target physical attacks, fire magic attacks, and group magic attacks. All in all, they are not even close to the threat level of a Cathy.

This is just showing what MGDown can do for you; it bounces back a quarter of the damage you take from magic, so its really good for enemy formations like this one.

I’m also really lucky and get a Light Card as a rare drop from the fight and immediately use it on Chezni.

Very minuscule upgrade for Chezni, but an upgrade is an upgrade.

This on the other hand is an immense upgrade! The High Bottle will heal for 800 HP per charge, which at this time is a full heal but it will stay relevant for a substantial amount of time.

This goes onto Midia to raise her Sphere spirit, since Chezni’s is maxed out.

And my luck from before is canceled out by the Cathys confusing 3/4 of my party. Wild shakes it off right away, but Chezni and Midia stay confused the entire fight, which is very very bad. Somehow I pull through though.

At least Wild gained a level.
The top two chests here contain a home door and a flight door. Nothing special there.


The clarification of what P Water is does not help matters much. At least Chezni is luckier now.

FastJo gained a level!

Another piece of equipment we got back in Dubour.


So many talk about drinking the tears of their enemies, but only Chezni actually does so.

And a weapon for Midia that I will not use because the bow is still giving her a better deal on defense.

With all the treasure found, we descend.

Over there we can see the guy protecting the treasure. I’m sure if we ask nicely, he’ll let us take it.


Along the way we have another encounter and so Chezni and Midia level up together.


I stand in front of the boss, heal everyone to full, and check my magic progress.


The Guardian does not let us take the Helmet of Kormu without a fight.

Furthermore, like all the other versions of this enemy, he can call in others to help him out. In theory this could make the fight tricky, except that he is vulnerable to both DEFdown and Freeze.

This is the damage I can get from a Bomb Bottle on these guys by the way.

And then he exploded.


And so we’ve obtained the second item of Kormu.

On our way out, we encounter the Hoods, or Hangya, who are very weak and easy to kill.


Some more levels I earn on my way out.

And on our way back to the tent, we fight a T.Rex, or Tyranza. This dinosaur doesn’t need arms when it can just bite you in half. It can hit twice a turn for some pretty serious damage, at least if you encounter it before gaining a bunch of levels and better armor. At this point, his damage is much more manageable.


And there you have it; we now have what we need to be able to go to the Throne of the Immortals.

By using the Actor clothes from the inventory, we all look like this. Hopefully it will be enough to use the Rope Network.
5 Likes
All right, that’s enough dithering from me, time to get posting again!


Success! We can now progress with the plot! Note that nobody in Barsas changes their minds about us, so we just move on.

There’s the trolley that we get in, and when we do, this jaunty tune starts playing!
Really makes me wish we used the rope network a whole lot more in this game.

The rope network takes us west and then north to this very, very, very big artificial mound with something science-fictiony going on in the middle. Throne of the Immortals/Gods sounds like its right for this kind of place.

Despite us being much much closer to Naskuot than Saskuot, this is firmly a Saskuot town. The game doesn’t explain this geographical incongruity, but I find that to be an interesting topic to speculate about in the history of Lennus.


We get off, only to learn that someone has cut the line out of Rekuon, so we are stuck here and have to complete our goal to move on. A bit rude.

If only we weren’t on a quest to save the world, we could just stop and listen to all that folklore.

The people here are the liberals of Saskuot; they pride themselves on being progressive and accepting, except they are only those things in comparison to their conservative counterparts. Hence not only do they massively overcharge us at the inn, but they’re also going to make us sleep with the animals out back. I pass on that.

This guy says that the great disaster has stopped the pilgrims from coming, and while Lord Zaygos says he’s going to solve the problem, his voice trails off, suggesting he has his doubts.

This guy is the epitome of the self-satisfied liberal, the sort who could vote for Hillary without holding his nose.
Then we enter the unmarked house next to the weapon and armor shop and…um…


I was unfortunately unable to capture the moment when the Dragon Quest priest trips on his way out. During our stay in this strange cameo, a different theme plays for us.


By special price, he means price gouging. The guy at the circus charged us the same, but he’s operating in hostile foreign territory so he probably can’t get good rates on his supplies. These guys are the jerks who won’t give good rates on the supplies to begin with.

Similarly, the weapon and armor shop here outrageously overcharges us for their limited goods. Pass.


Looks like we know the name of the next boss we have to fight for the Armor of Kormu.

He tells us that there are monsters now and if we value our lives we won’t attempt to climb to the summit. We are of course 13 years old, so we value nothing.

Now I could just go ahead and pay for this right here and now, but I decided to do a little experiment. I tell the man no, and then go off and buy super expensive junk from the shops until I have only 66 G left.


Aha! My cunning plan to spend 8600 gold to save 100 was a complete success!
…Then I remember how math works and realize this was a terrible plan. So I go back in time to when I still had my money and pay the 100 gold.

Oh we’ll give him our regards all right.

Almost immediately we are beset by the monsters; this area is pretty small, but the encounter rate is very high and the monsters here hit hard. The Footsaur is able to hit multiple members of the party with his attack, or do a focused double attack on one party member. Each blow can do more than 100 points of damage easy, so that adds up fast. The Twinhead can do an Air Elemental magic attack that hits the entire party for significant damage, and has a physical attack that hits multiple party members. You will be healing after every fight here.

Fortunately, the first chest we open is the most important by far, giving us our second High Bottle! This will help our healing reserves immensely.

New enemy, the Landpods. Nothing special about them, they can hit multiple times but that’s about it.

Treasure and praise every preemptive strike you get on the enemies here.


We gain level after that fight, and not for the last time around here.

Here we have the splitbugs again, but in a new formation that lets them make full use of their splitting capacity. If I wanted to I could make them fill the whole screen, but I want to progress and not die, so I don’t.

It also gives Fastjo a level up, so that’s pretty nice.

Considering we’re going to be getting legendary armor here soon, I don’t even bother about equipping this.

And here we have more new enemies, the GusStools on the sides and the Stingreds down below. These enemies continue the theme of being able to hit multiple party members at once. It really makes the notion of any kind of tanking in your party a bit absurd when everyone is going to get hit one way or another. Not that games of this era had tanking beyond “put the guy in heavy armor in the front space and maybe the enemies will hit them more often”.

After a fight involving a Footsaur, I win an Aybro spear. This is because the Footsaur is the same enemy type as the Elepsaur, and the Elepsaur was known in Lennus as the Aybro. In other words, the Aybro spear is basically one of the tusks that we managed to harvest after the battle. Neat.


More level ups.

That there would be Jo-An, but there’s one more treasure I want to grab before moving on.


Wild decides to run circles around us and gains another level before FastJo gets his.

The Power Boomerang is a weapon that I could give to Midia to give her a physical group-hitting attack, but I pass on that. Her magic is much more valuable.


On our way back to Jo-An, Chezni and Midia level up one more time.


Also, we hit a milestone here; Midia’s sphere spirit is maxed out! Wild’s spirits are also nearing their maximum, so her time in the team has been well spent.

But enough delaying, let’s see what kind of fearsome boss fight Jo-An has in store for us!


Or he could be a really swell guy and just give us the armor. This mountain summit is brutal enough as is and we are almost out of healing so I’m okay with this.

And now Chezni is fully equipped and ready to fulfill his destiny!


And so now we are back to our loveable selves, while Jo-An takes up the call of a travelling performer.


You know Jo-An, you were a pretty cool dude. If fate lets us meet again, that’s fine by me.
At this point the door on the upper left is opened for us. The building in the middle doesn’t open, and the door on the right is like the one back in the magic school and we still don’t have the means to open that one yet either. So we enter the only door we can.

We climb down the ladder here and…

Um…that’s a pretty creepy face right there. Why did they do that? Let’s get on the boat and forget about the creepy face of absolutely no importance whatsoever.


And so we are dropped back off at Daphne’s home, bringing us full circle. Next time, we show Daphne that we have achieved our goals in record time and get that coveted gold star! And also maybe save the world.
6 Likes